Camera Scanning
Why Use a Digital Camera for Scanning?
This is a subject I’ve been wanting to write about for a while now. One of my first ideas for a post, really. My scanning setup has changed so much since I first started “scanning” with a digital camera. I finally realized that it’s going to keep changing and I should just write about the damn thing, already. This is a long one, but hopefully informative to people that are interested in making digital copies of their film negatives.

Nikon D800E and Negative Supply Carrier / iPhone 12 Pro
First off, why would you use a digital camera to duplicate your film negatives? That’s a fantastic question and I’m not against other methods. It’s just that other methods that give anything close to the same result or better are incredibly expensive, usually use old software that can only run on old hardware and is likely losing support. However, a couple of great options are the old Nikon Coolscan series and the Prime Film XAs. I’d stay away from most flatbed scanners. A lot of fiddling around for subpar results.
Scanning with a digital camera, even with a flimsy setup can yield fantastic results. It can save money but that isn’t what this post is about. My setup started with an Epson V600 film holder, my iPhone as a light source and a tri-pod inverted to hold my Fuji X-Pro 1 with a vintage Nikkor Micro lens attached. The image quality I was getting from this setup had me listing my Epson V600 on eBay almost immediately and buying a Lomography Digitaliza film holder to use. The setup has evolved a lot since last year and you can find all of the equipment I use listed on my Uses page.
I’m going to go over my entire setup and process from start to finish. This is what has worked for me as I’ve upgraded pieces here and there, and changed my workflow where it felt right. The results I’m getting are on par with, if not better than any lab scans I’ve gotten. So let’s get into this, shall we?
Setting Up
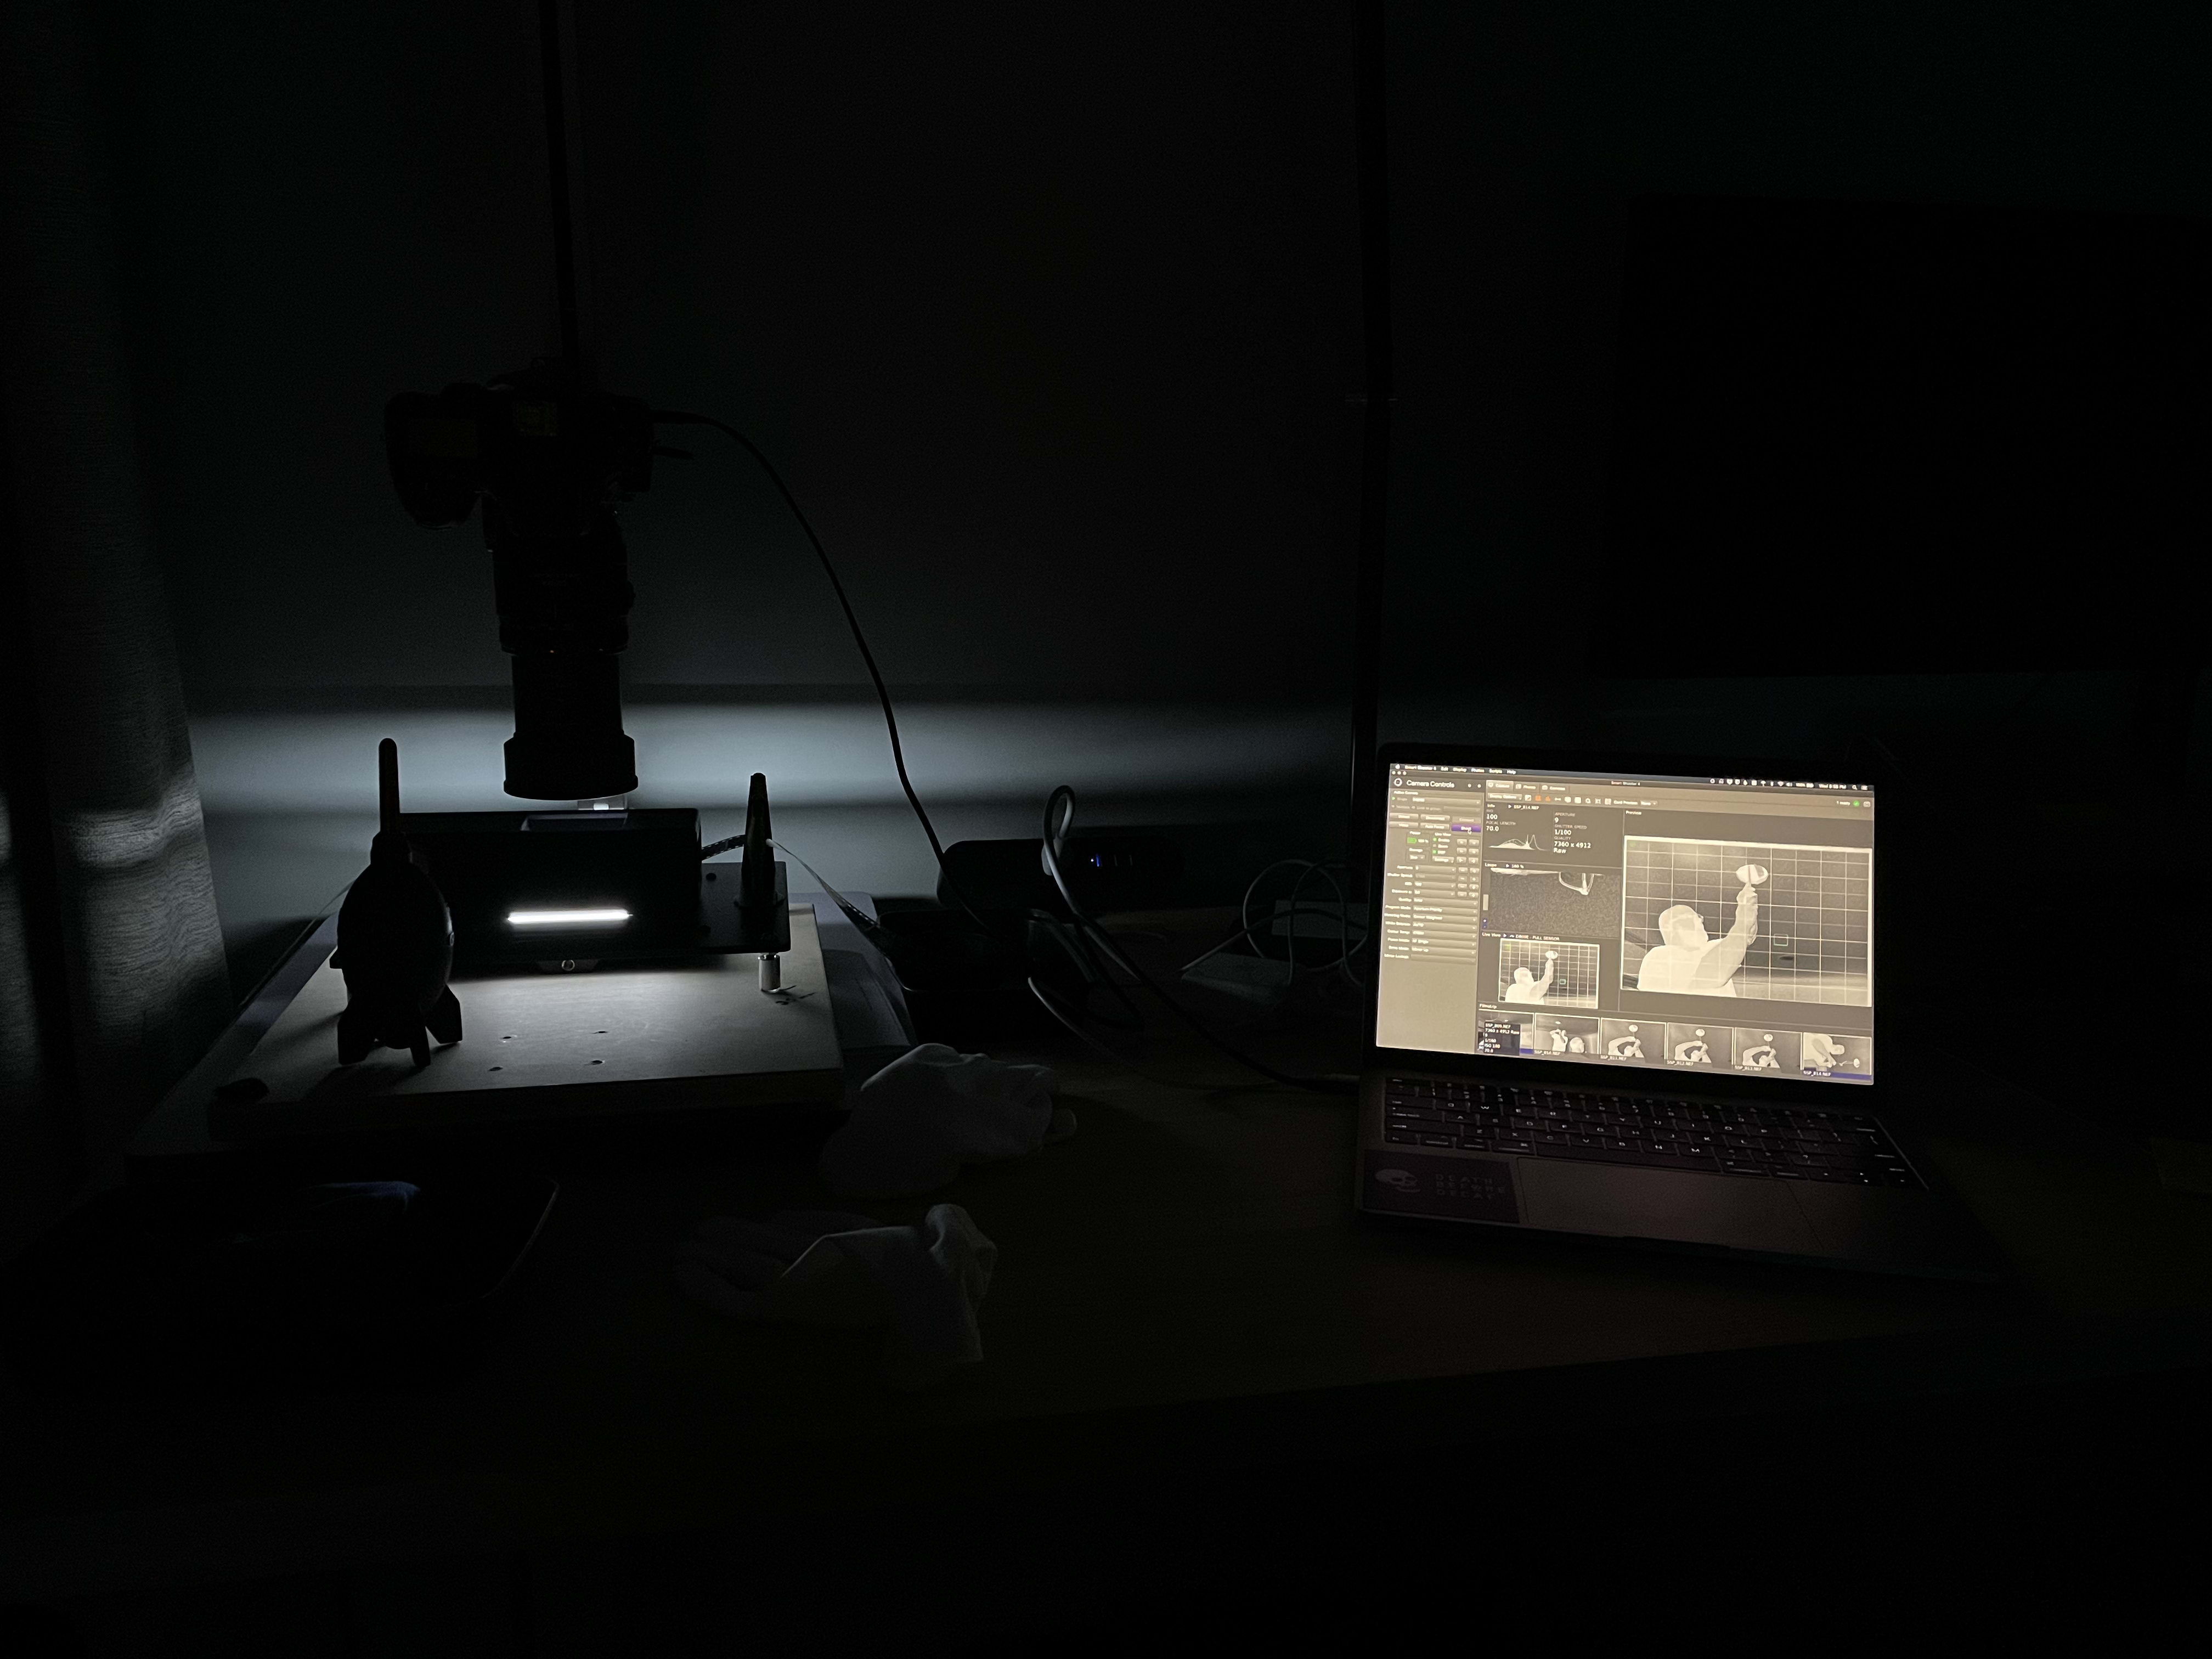
The most important thing that I’ve found next to keeping the film flat is that everything must be level. The best way to check that the camera is level with the film carrier is using the mirror method. I use the Negative Supply MK1 + MK2 mount which has four independent leveling feet. This helps in getting the film carrier perfectly parallel with the camera. To take it further I use a digital level to check the tilt of the camera on my copy stand before each scanning session. Cheers to Dave Rollans for that tip. My camera is apparently heavier on one side as it likes to shift a bit over time. This sounds like overkill but when using a macro lens, the slightest shift of a flat plane can make quite a difference in depth of field.

Using a digital level / iPhone 12 Pro
I like to capture images of the film while tethered to my laptop. This has a couple of advantages. One is that the files will be captured to my hard drive rather than a card to transfer from later. Two, I can use software to control my digital camera. This helps me frame, check focus and make changes accordingly without having to touch my camera that I just got nice and level. Pretty much every major camera manufacturer makes software that does this, but I like to use Smart Shooter. It isn’t perfect but it was a helluva lot cheaper than Nikon’s ancient software.
After I set the camera up and get it tethered, I like to target a specific folder to capture images to for each roll. This is important for my Lightroom workflow and I took some of this info from a
Kyle McDougall video on his workflow.
It’s very informative and I highly recommend it. I point Smart Shooter to a folder in my default Pictures folder; Film Scans/YYYY/Misc/YYYY-MM-DD_FILMSTOCKISO/Scans. This misc folder is used for general rolls shot. If this were for a specific project or trip I would capture to a folder named something like Film Scans/YYYY/OBX Vacation/YYYY-MM-DD_FILMSTOCKISO/Scans. The date is the date of development, which is usually the same day of scanning if I time things right. If there’s more than one roll per session I like to add the roll number as well. At this point I also like to create a folder named Exports to keep any kind of exported images contained in the same area. This folder could then branch off into subfolders like Web, For Print etc. So a working example of a session could look something like:
- Film Scans/2021/OBX Vacation/2021-05-12_PORTRA400_01/Scans
- Film Scans/2021/OBX Vacation/2021-05-12_PORTRA400_02/Scans
- Film Scans/2021/OBX Vacation/2021-05-12_EKTAR160/Scans
- Film Scans/2021/Misc/2021-05-12_HP5400/Scans
I don’t usually scan that much film per session, just displaying how a single session with multiple film stocks and organization could look like.
Scanning
Now I’ll go to the downstairs bathroom where I hang my film to dry. While gloved I carefully remove the clips and the roll of film from the shower and carry it over to my workstation. I like to kind of loosely roll the film back up. When loading the strip into the film carrier I run it through an anti-static brush and make sure the emulsion side is facing up. This is very important and helps the lens have something to focus onto better. The captured image will be flipped horizontal but don’t worry about that right now.
I turn my camera and light source on, and turn the room lights off. You want to scan in a dark room so no stray light hits the negative. I check Live View to turn that on and now I have a good (fairly pixelated) view of what the camera is seeing. I set the camera’s lowest native ISO, which in my case is 100. Set the aperture to F/11. F/11 or F/8 is what you want, here. My particular lens is sharp from edge to edge at F/11 if leveled well. I sometimes set my shutter speed to auto, but since getting the Negative Supply basic light, I’ve gone back to about 1/25th or 1/30th of a second. Basically the histogram needs to be shifted to the right. My older light was incredibly bright but the Negative Supply light seems to be better color balanced and is easier to use and doesn’t utilize a battery to stay powered on, which I like.
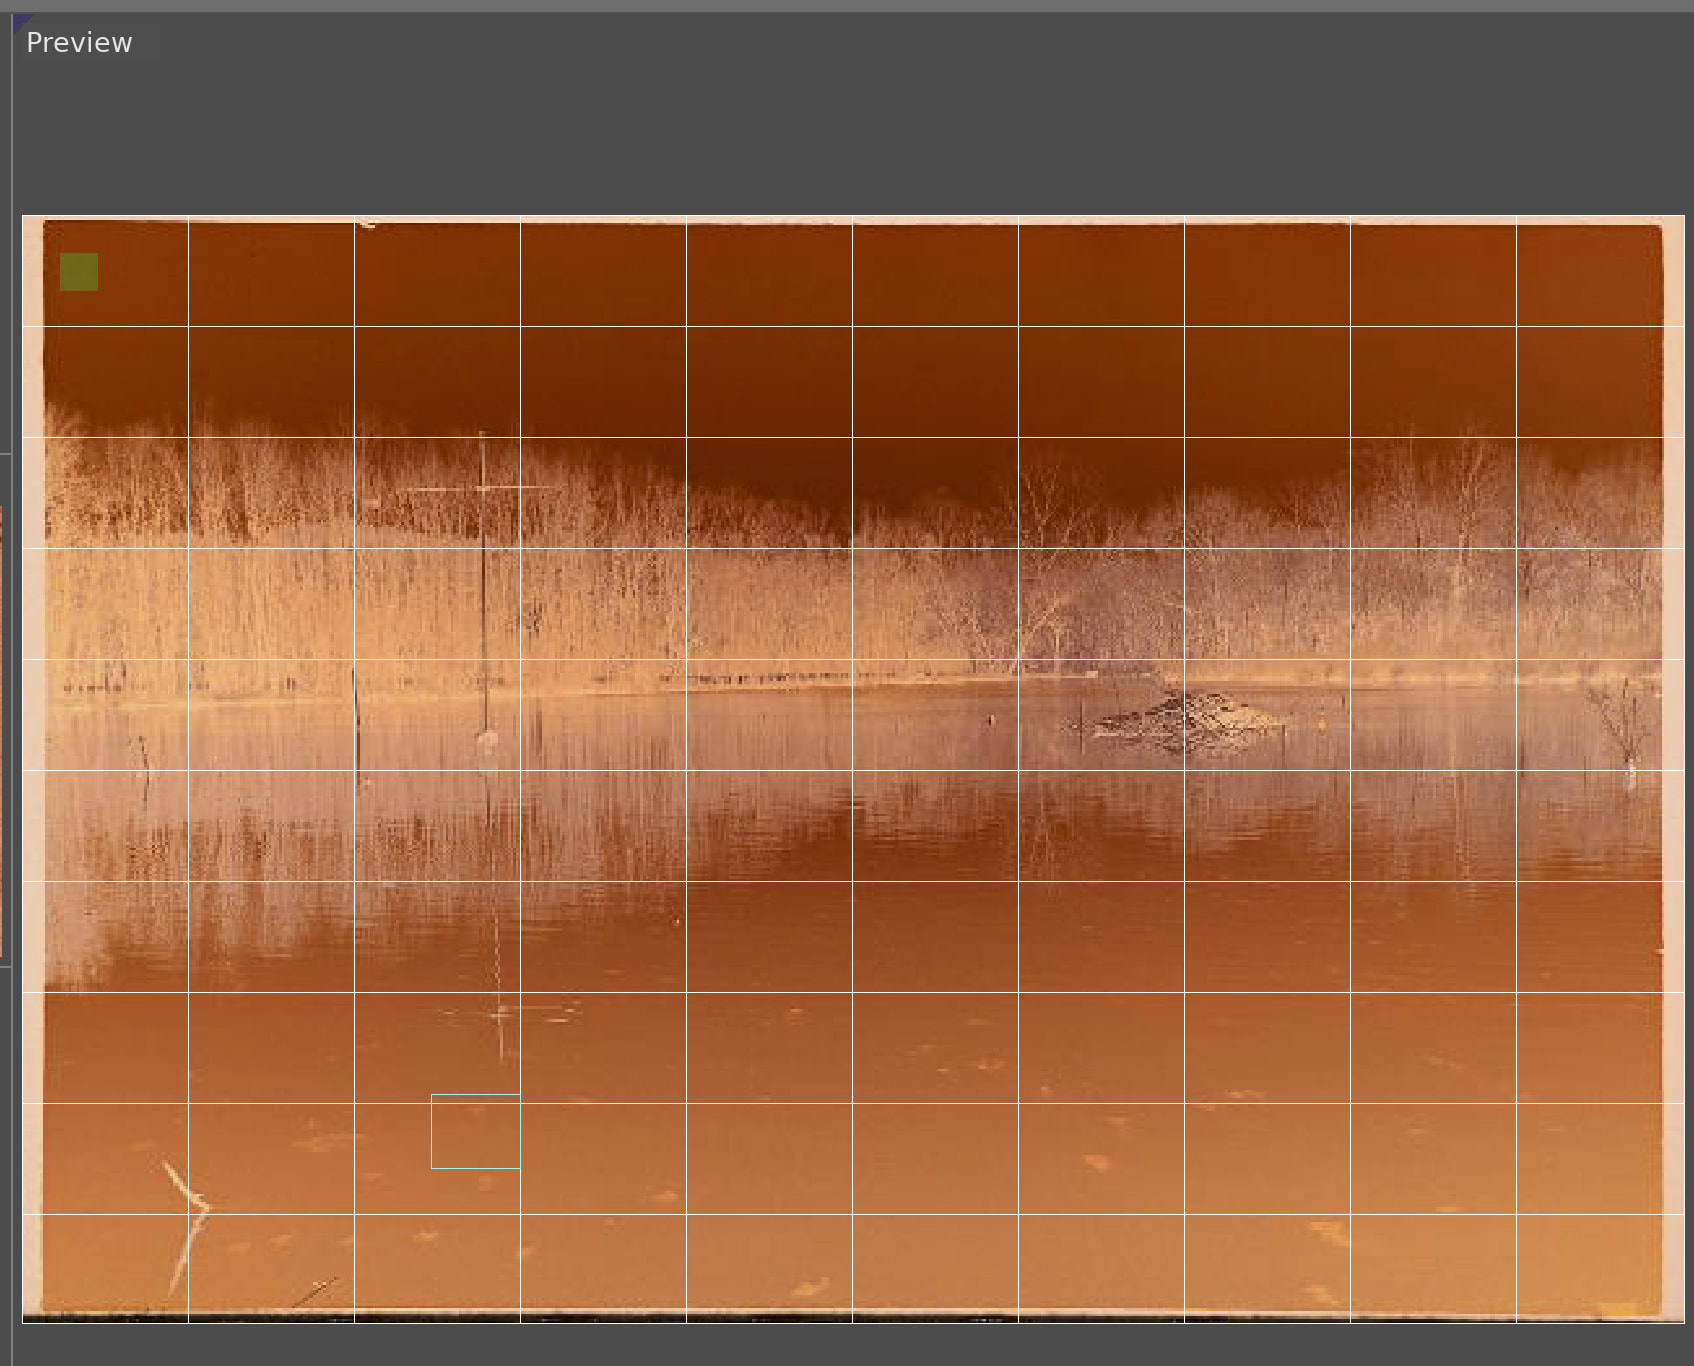
Preview of negative in Smart Shooter / Screen capture
After advancing the film to the first frame, I like to make sure that I’m zoomed in close enough to take advantage of as much of the sensor as possible, but also leaving a bit of the film’s mask. This is important for processing the negatives with Negative Lab Pro, which I will write about in the next post. I try to get the lines as straight and level as I can, but sometimes on a roll of 35mm film, your camera may have shifted the film a little here and there. It’s never 100% straight and even. Once everything is framed and centered, I blow some air onto the film with a rocket blower and auto focus. Auto focus with my current lens has nailed the grain every time. You want to focus on the grain just like you would when making darkroom prints to make sure that the image is nice and sharp. You typically don’t need to with the Negative Supply MK1 carrier, but I often auto focus on each frame before clicking the Shoot button in Smart Shooter. I just notice that sometimes after I capture a negative, the Loupe view in Smart Shooter will let me know if the grain is slightly out of focus.

Loupe view in Smart Shooter / Screen capture
Now it’s just as easy as advancing the film and snapping a photo. With re-focusing and blowing air on each frame I’m looking at about 5-10 minutes to finish an entire roll. I could easily breeze through a roll in about two minutes if I’m being less careful. This is incredibly fast compared to a flat bed scanner or even a dedicated film scanner and the results are really good. Here’s an image of the Biltmore Estate I took from across the lawn with a 90mm lens, followed by a 100% crop.

Kodak Portra 800 / Leica 90mm Tele-Elmarit

100% crop of a dSLR scan
The next post will go over my workflow in Lightroom. How I import, convert and organize my film negatives. I’ll also go over current and future plans on backing files up as well. I didn’t want to combine the two posts as this one is pretty long already. If you read through everything I hope this was helpful and you learned something.
Update: Here’s part two, my Lightroom Workflow for editing my scans.